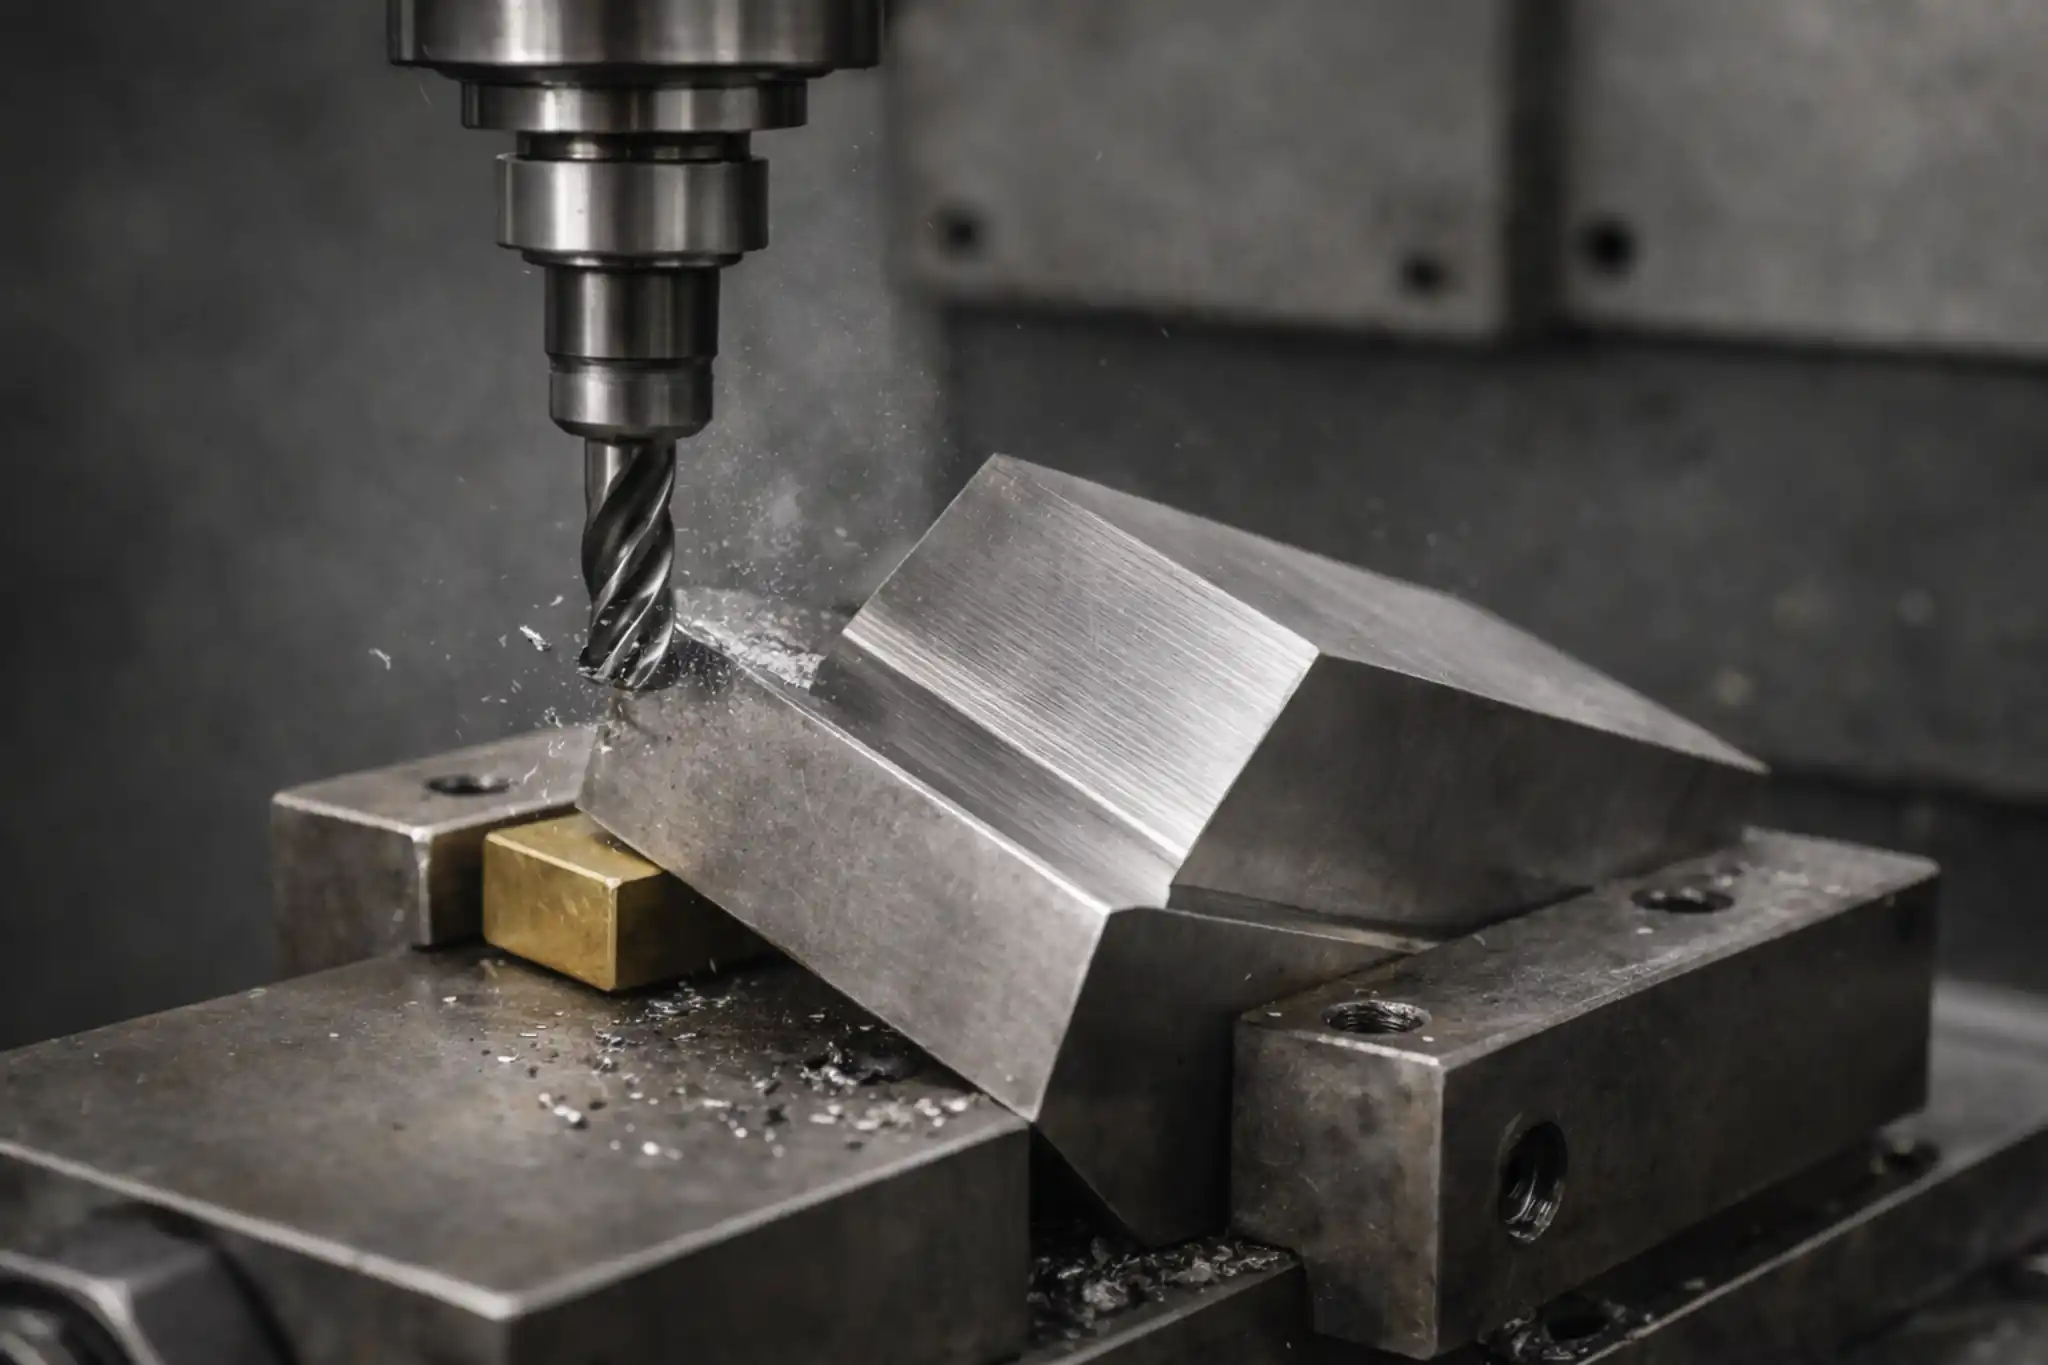

Face milling and end milling are two of the most fundamental and widely used cutting methods in CNC machining. While both are forms of milling, they differ fundamentally in their purpose, method, and applications.
Core Concepts: What Are Face and End Milling?
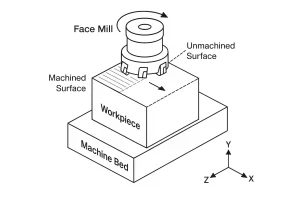
- Face Milling: This is the process of using a face mill cutter to machine the horizontal surface of a workpiece, creating a flat surface. The cutting forces are primarily applied by the cutting edges on the face and periphery of the tool.
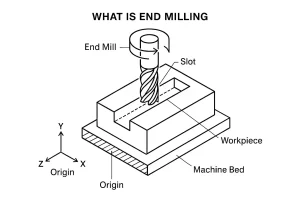
- End Milling: This is the process of using an end mill to cut in multiple directions (e.g., side and bottom) to create features like slots, profiles, and pockets. The cutting forces are primarily applied by the cutting edges on the side of the tool.
Common Tools for Face and End Milling
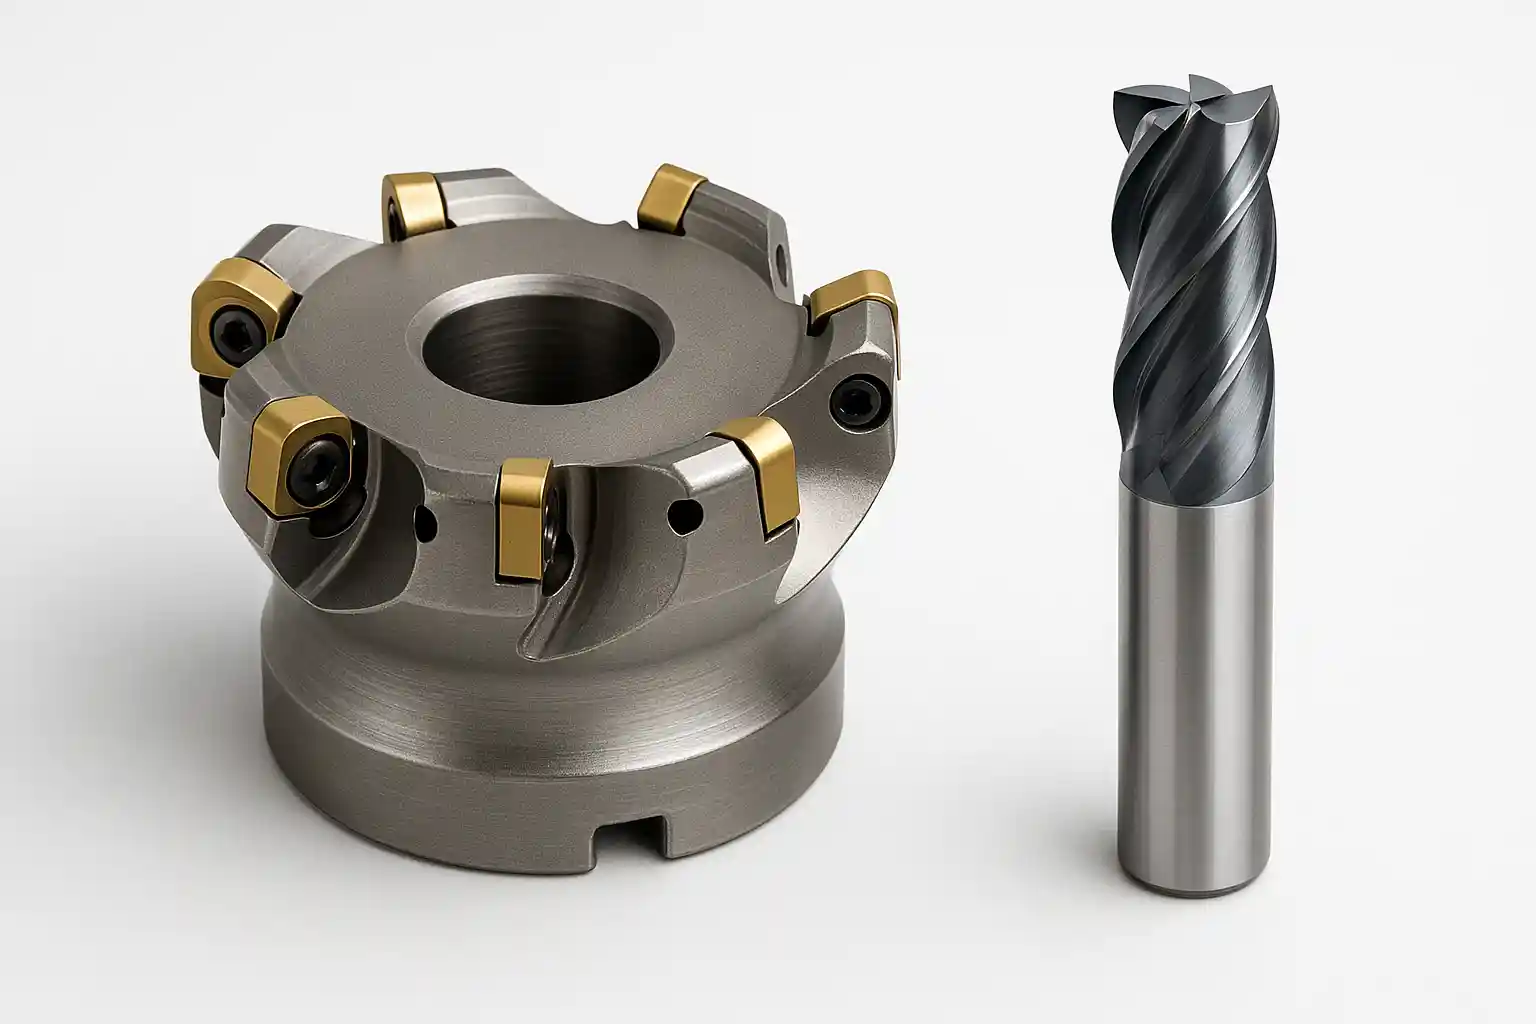
Common Tools for End Milling
The variety of end mills is vast. They are primarily used to shape various 3D and 2D geometries. Their common feature is that the cutting edges are mainly on the side and bottom, allowing for both lateral and plunging cuts.
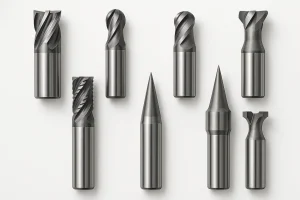
- Flat End Mill: The most common type, used for machining square-bottomed slots and flat surfaces.
- Ball Nose End Mill: Used for curved surface machining and 3D contour milling.
- Bull Nose End Mill: Used for roughing and creating cavities with corner radii.
- Roughing End Mill: Used for rapid removal of a large volume of material.
- Tapered End Mill: Used for machining side walls with a draft angle.
- Chamfer Mill: Used for machining chamfers and deburring.
- Corner Rounding End Mill: Used to machine a specific radius on the edges of a part.
- Dovetail Mill: Used for milling dovetail slots.
- T-Slot Cutter: Used for milling T-shaped slots.
Common Tools for Face Milling
Face milling cutters are mainly used for efficiently machining flat, smooth surfaces. Their cutting edges are primarily on the face of the tool, cutting perpendicular to the workpiece surface.
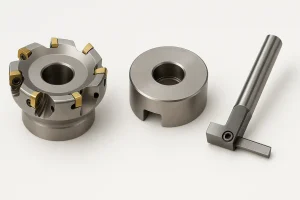
- Face Mill Cutter: The most typical face milling tool. It usually has a large diameter and features multiple inserts on its face, used for large-area surface machining.
- Shell Mill: A tool without an integrated shank that is connected to an arbor, often used for face milling.
- Fly Cutter: A simple face milling tool, typically with one or two adjustable inserts, suitable for small-batch flat machining that requires a very high surface finish.
Key Differences
| Comparison Aspect | Face Milling | End Milling |
| Cutting Direction | Primarily perpendicular to the spindle axis, cutting with the end of the tool. | Primarily parallel to the spindle axis, cutting with the side of the tool. |
| Tool Structure | Tool diameter is typically large, with cutting edges mainly on the face for wide-area machining. | Tool diameter is usually smaller, with cutting edges on the side and bottom for detailed cutting. |
| Machining Purpose | The core goal is to remove a large amount of material and create a flat, level surface. | The core goal is to shape profiles and geometric features such as slots, pockets, and contours. |
| Cutting Forces | The cutting force is mainly axial, acting perpendicular to the workpiece surface. | The cutting force is mainly radial, acting horizontally on the workpiece side walls. |
| Typical Applications | Initial surfacing of parts, roughing and finishing large flat surfaces. | Mold making, part contouring, and cutting complex features. |
Advantages and Limitations
-
Face Milling
-
Advantages:
-
High Material Removal Rate: Face mills have a large diameter, allowing them to cover a wide area in a single pass. The cutting force is applied to the face of the tool, enabling larger axial depths of cut. This removes a significant volume of material quickly, making it ideal for roughing.
-
High Surface Quality: By adjusting tool and cutting parameters, face milling can easily produce a flat and smooth surface, perfect for creating a clean reference plane for subsequent precision machining.
-
-
Limitations:
-
Limited Scope: Face milling is restricted to machining flat surfaces. It cannot perform side cuts, open slots, or create complex 3D contours. Its application is limited to a single type of operation.
-
End Milling
-
Advantages:
-
High Flexibility and Versatility: End mills can cut in multiple directions using their side and bottom cutting edges. This allows them to create various features like slots, pockets, and complex 3D contours, making them a core tool for almost all CNC tasks.
-
Suitable for Fine Details: End mills have a smaller diameter, allowing them to enter tight spaces and intricate areas. They are ideal for finish machining of complex features and contours.
-
-
Limitations:
-
Inefficient for Large Surfaces: While an end mill can be used to machine a flat surface, its efficiency is low due to a smaller radial depth of cut. This makes it far less efficient than a face mill for large-area surface machining.
-
Requires High Rigidity: When performing side milling, the cutting force is applied to the side of the tool, which can cause deflection or chatter. This requires the tool and machine to have high rigidity to maintain machining accuracy
-
-
-
Practical Guide: When to Use Each Process
- Typical Scenarios for Face Milling:
- Flat Surface Roughing: When you need to quickly machine an uneven raw surface into a flat reference plane.
- Large-Area Finishing: When a large, high-quality flat surface is required, such as a machine bed or a precision instrument mounting face.
- End-Face Milling: Used to ensure the end face of a part is perpendicular to its adjacent surfaces, achieving a 90-degree angle.
- Typical Scenarios for End Milling:
- Slotting and Cutoff: When you need to mill various-depth slots along the interior or edges of a part.
- Pocket Milling: When you need to machine an internal pocket or cavity within a part, commonly used in mold making.
- Contouring: When you need to machine the outer profile or complex 3D surfaces of a part, such as a cam or blade.
- Drilling and Boring: In some cases, end mills can also be used for simple drilling and boring.
Conclusion
In conclusion, face milling and end milling are not mutually exclusive but rather complementary processes. In a typical machining workflow, face milling is often used first to quickly remove material from the surface, followed by end milling to create slots, contours, and detailed features, completing the final part. Mastering the unique characteristics and applications of both is key to efficient CNC machining.
Contact Us
After you’ve mastered the theory, choosing the right tools is the crucial next step toward achieving high-efficiency machining. Our team of experts is ready to provide you with professional tool selection advice and customized solutions, helping you turn your theoretical knowledge into outstanding productivity.
Contact us today to begin your professional manufacturing journey.